
First of all, I LOVE gilding. I love gilding because I love shiny things and even more so if I’ve created a shiny thing from an old or unloved item. So in quick time with minimal equipment and pretty cheap materials you can reinvigorate or transform items ranging from the ones you might expect like picture frames and statuettes to others that you might not expect like shoes, handbags and furniture. You can see examples of all of these on my Instagram: @mucknbrass
The unique metallic finish that you can achieve with gilding and the choice colours now available mean the transformations are stunning. And you can turn the dullest looking everyday object into a statement piece in just a couple of hours.
What you’ll need:
A thing to gild: I’ve gilded everything from a pair of old brown boots to a full-size model of a horse, so if it stands still for long enough it’s a candidate for gilding in my book.
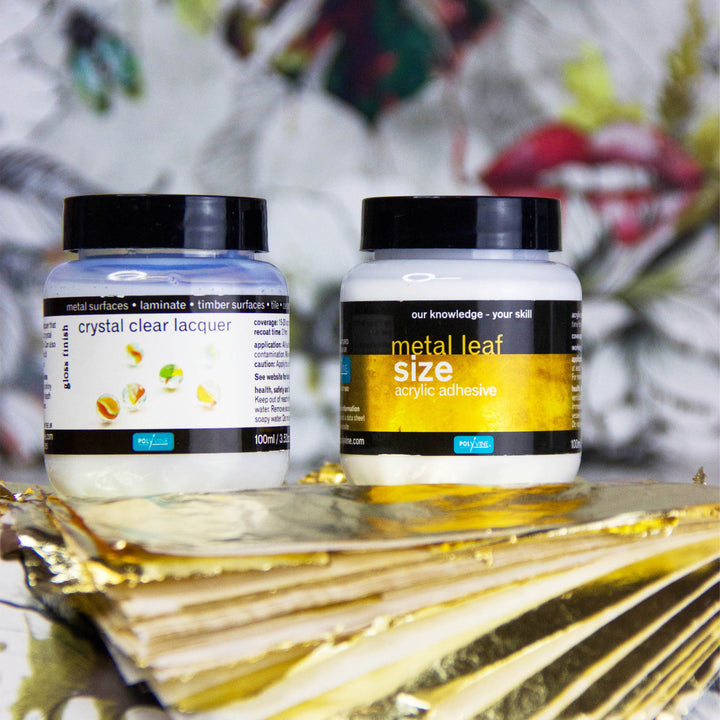
Metal leaf size: This is special adhesive which remains sticky after drying and is available here.
Food colouring: Particularly if the item you are gilding is white to begin with adding a tiny amount of food colouring will allow you to see where you’ve applied the metal leaf size, I usually use yellow as it affects the colour of the finish the least (the leaf can be slightly transparent and strong colours can show through) but you need to be extra careful when using silver leaf as it is especially prone to the yellow showing through.
Metal leaf: This can be real gold or synthetic which has a much higher shine finish and is available in gold and a wide variety of colours available here.
Brush/Brushes: A brush for applying the metal leaf size and for dusting off the excess leaf. Any old or new paint brush will do, so long as it’s clean and dry with soft bristles. Usually between a ½ and 2 inch brush is a good size (you can use the same brush for both but if you do you’ll have to clean and dry it after sizing ready for dusting.
Varnish: To protect your leaf and keep it beautiful for longer available here.
Sanding Pad: Depending on the surface sometimes a quick sand is advisable.
Vacuum cleaner with a nozzle: Not vital but a great way to minimise mess while you’re dusting of the excess leaf.
Low-tac tape: If there are parts of the project you don’t want to gild, for instance bits you want to keep the original colour for contrast, soles of shoes or handles on furniture.
In the Muck N Brass Gilding Starter Kit you get everything you need for a small project including: Polyvine Metal leaf size 100ml, 50 sheets Metal leaf in a choice of colours, a Brush and Polyvine gloss finish varnish 100 ml. Or you can get individual gilding products in various sizes here.
How to:
Tape off the areas you don't want to gild
If you don’t want to gild your entire object, use a low-tac tape (masking tape) to cover the parts you want ungilded. This will keep the metal leaf size in the areas that you want leaf on. It being low-tac tape you can remove it easily without damaging anything.
Prep the surface
Make sure the surface is clean, dust free and dry. Some surfaces like wood or worn leather can benefit from a light buffing with the sanding pad, others like glass just need to be clean and dry. If buffing, do so until the surface is smooth then use a dry cloth to remove any dust.
Apply the Metal Leaf Size with a paintbrush
Pour some metal leaf size into a clean pot– add and stir in the food colouring to size if working on a light or white surface (this will help you see where you have painted the size on). Apply size using paintbrush in up and down motions, covering the area evenly – Check for any drips that may form, if any do just smooth over with your brush.
Drying Time
Wait at least 30 minutes until the size has dried to a clear finish. At this point, the size will still feel tacky, fairly dry but sticky to the touch. It will then remain tacky for several more hours, giving you plenty of time to apply the gold leaf.
Lay the leaf on the object
It will only stick to the tacky areas of the surface. If your sheets of leaf don’t cover the entire width of the surface, you can arrange the pieces in a simple grid pattern. Cover with small overlaps on a smooth surface and larger overlaps on a heavily textured surface. Don’t worry about small gaps at this stage as some of them will be filled during the brushing stage and if there are any after that you can easily fill them after that.
Brush the leaf off
Use a soft brush to make the leaf adhere to the object completely and smoothly. Move in a gentle back-and forth motion. The movement of the brush will remove the excess pieces of leaf. With real metal leaf the excess comes off in slightly larger pieces but with the synthetic type which
I use the excess comes off like glitter. To save on mess (it really does get everywhere) I hold the nozzle of a vacuum cleaner in one hand while I am using the brush with the other to catch the glittery dust.
Look for imperfections
This can be sized areas that you missed when applying the leaf in which case just apply more leaf and brush off the excess as before or it can be areas that you have missed with the metal leaf size, if this is the case apply metal leaf size to those areas, leave to dry until tacky as before and apply leaf to fill the gaps. Apply small bits of leaf to cover them.
Seal the gold leaf
Apply Polyvine Crystal Clear lacquer in High Gloss finish. The topcoat will protect the leaf from damage due to handling, dust and water. Allow the lacquer to dry over night.
Stand back, admire your handywork and enjoy the reactions of friends and family.
And don’t forget to tag me in your makes @mucknbrass
FAQ’s
Can I use PVA glue instead of metal leaf size for gilding?
For the best results use the metal leaf size, which is specially made for the job, I’m all for substituting for a cheaper easily available alternative when it works just as well, but this is not one of those times.
How do I avoid the square pattern of the leaf showing up on finished project?
This occurs much more with real metal leaf and much less with the synthetic leaf which I sell and mostly use. It’s a feature of real gold leaf and can look beautiful, if you definitely want the more faultless, metallic finish go for a synthetic leaf.
Can I use the excess leaf that I’ve brushed off?
You can and you often find yourself filling in gaps with larger pieces as you are brushing off but usually the tiny bits are not much use and are not worth saving so they end up in the vacuum cleaner.